Lesson 11: Intercanister calls.
To achieve the vision of the Internet Computer, services (i.e canisters) needs to be able to call each other and run in an interoperable way. This capability is achieved through inter-canister calls. In this lesson, we will see how we can realize such calls and the potential issues to avoid.
A simple example
To illustrate inter-canister calls we will use the following example, with 2 canisters:
- Secret canister: This canister stores a secret password and this password should be divulgated only to users that paid. To verify payments, a mechanism of invoices is used.
actor Secret {
    getPassword : shared () -> async Result.Result<Text, Text>;
};
- Invoice canister: This canister is responsible for creating, storing and checking the status of invoices.
actor Invoice {
    createInvoice : shared () -> async InvoiceId;
    checkStatus : shared (id : InvoiceId) -> async ?InvoiceStatus;
    payInvoice : shared (id : InvoiceId) -> async Result.Result<(), Text>;
};
Where invoices are defined as follows:
public type InvoiceId = Nat;
public type InvoiceStatus = {
    #Paid;
    #Unpaid;
};
public type Invoice = {
    status : InvoiceStatus;
    id : InvoiceId;
};
For the purpose of this lesson, this example is oversimplied. If you are interested in how a real invoice canister looks like, check the invoice canister from DFINITY.
Calling an actor by reference.
The most straighforward way to call another canister is by reference. This technique will always work, whether you are working locally or on mainnet but it requires two things about the canister you want to call:
- The canister id.
- The interface of the canister (at least partially).
For the sake of this example, we will assume that the Invoice canister is deployed with the following canister id: rrkah-fqaaa-aaaaa-aaaaq-cai. To call this canister from the Secret canister we use the following syntax in secret.mo. Any type used in the interface needs to be imported or defined previously in secret.mo.
let invoiceCanister = actor("rrkah-fqaaa-aaaaa-aaaaq-ca") : actor {
    createInvoice : shared () -> async InvoiceId;
    checkStatus : shared (id : InvoiceId) -> async ?InvoiceStatus;
    payInvoice : shared (id : InvoiceId) -> async Result.Result<(), Text>;
};
Once invoiceCanister is defined, any function can be called. For instance, that's how you would call createInvoice.
let invoiceId = await invoiceCanister.createInvoice();
When you import an actor by reference, you only need to specify the interface that you plan to use. For instance, if you take a look at secret.mo we never use the payInvoice function. That's why we could simplify the actor declaration.
let invoiceCanister = actor("rrkah-fqaaa-aaaaa-aaaaq-ca") : actor {
    createInvoice : shared () -> async InvoiceId;
    checkStatus : shared (id : InvoiceId) -> async ?InvoiceStatus;
};
Importing locally
For this section, check the source code in [ADD LINK]. When you are working locally, assuming that your canister is defined in
dfx.jsonas follows.
{
  "canisters": {
    "invoice": {
      "main": "invoice.mo",
      "type": "motoko"
    },
    "secret": {
      "main": "secret.mo",
      "type": "motoko"
    }
  }
}
You can the following syntax at the top of your main file.
import invoiceCanister "canister:invoice"
actor Secret  {

    let invoiceId = await invoiceCanister.createInvoice();

};
Generally, to import a canister locally, you use the following syntax at the top of your main motoko file:
import Y "canister:X"
X is the name given in dfx.json to the canister you are tring to import. Y is how you want to reference the import in the following code.
Importing on the mainnet
This syntax is currently not available due to tooling limitations but will be available at some point.
Finding the interface of a canister
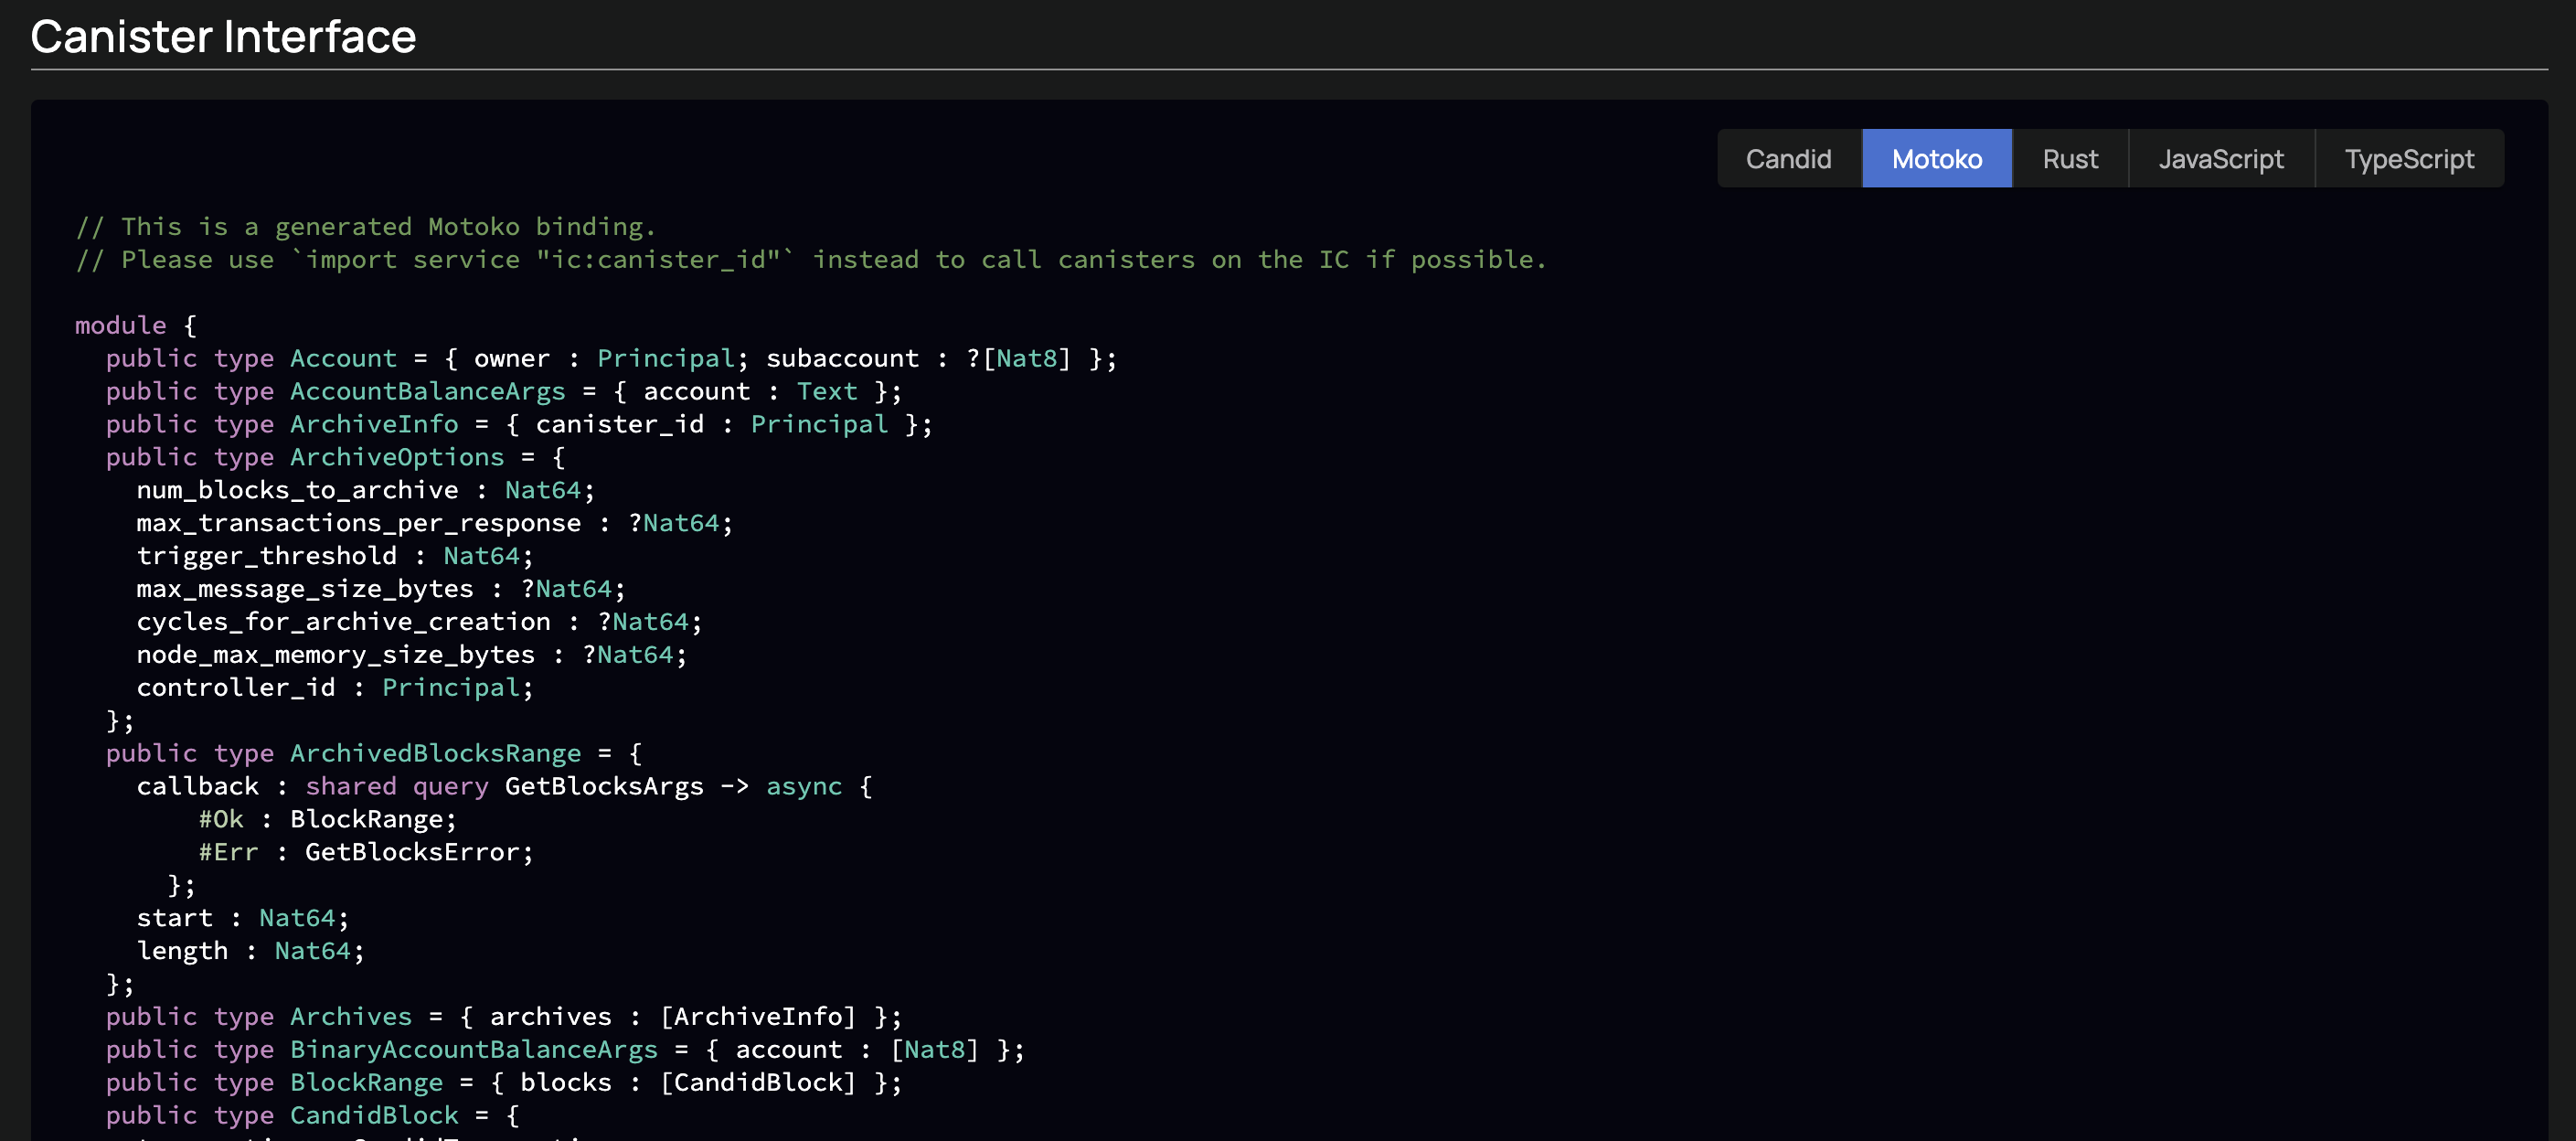
Before calling another canisters, you might want to check its interface. To find the interface of any canister, you can use the Internet Computer Dashboard.
- Navigate to the the dashboard.
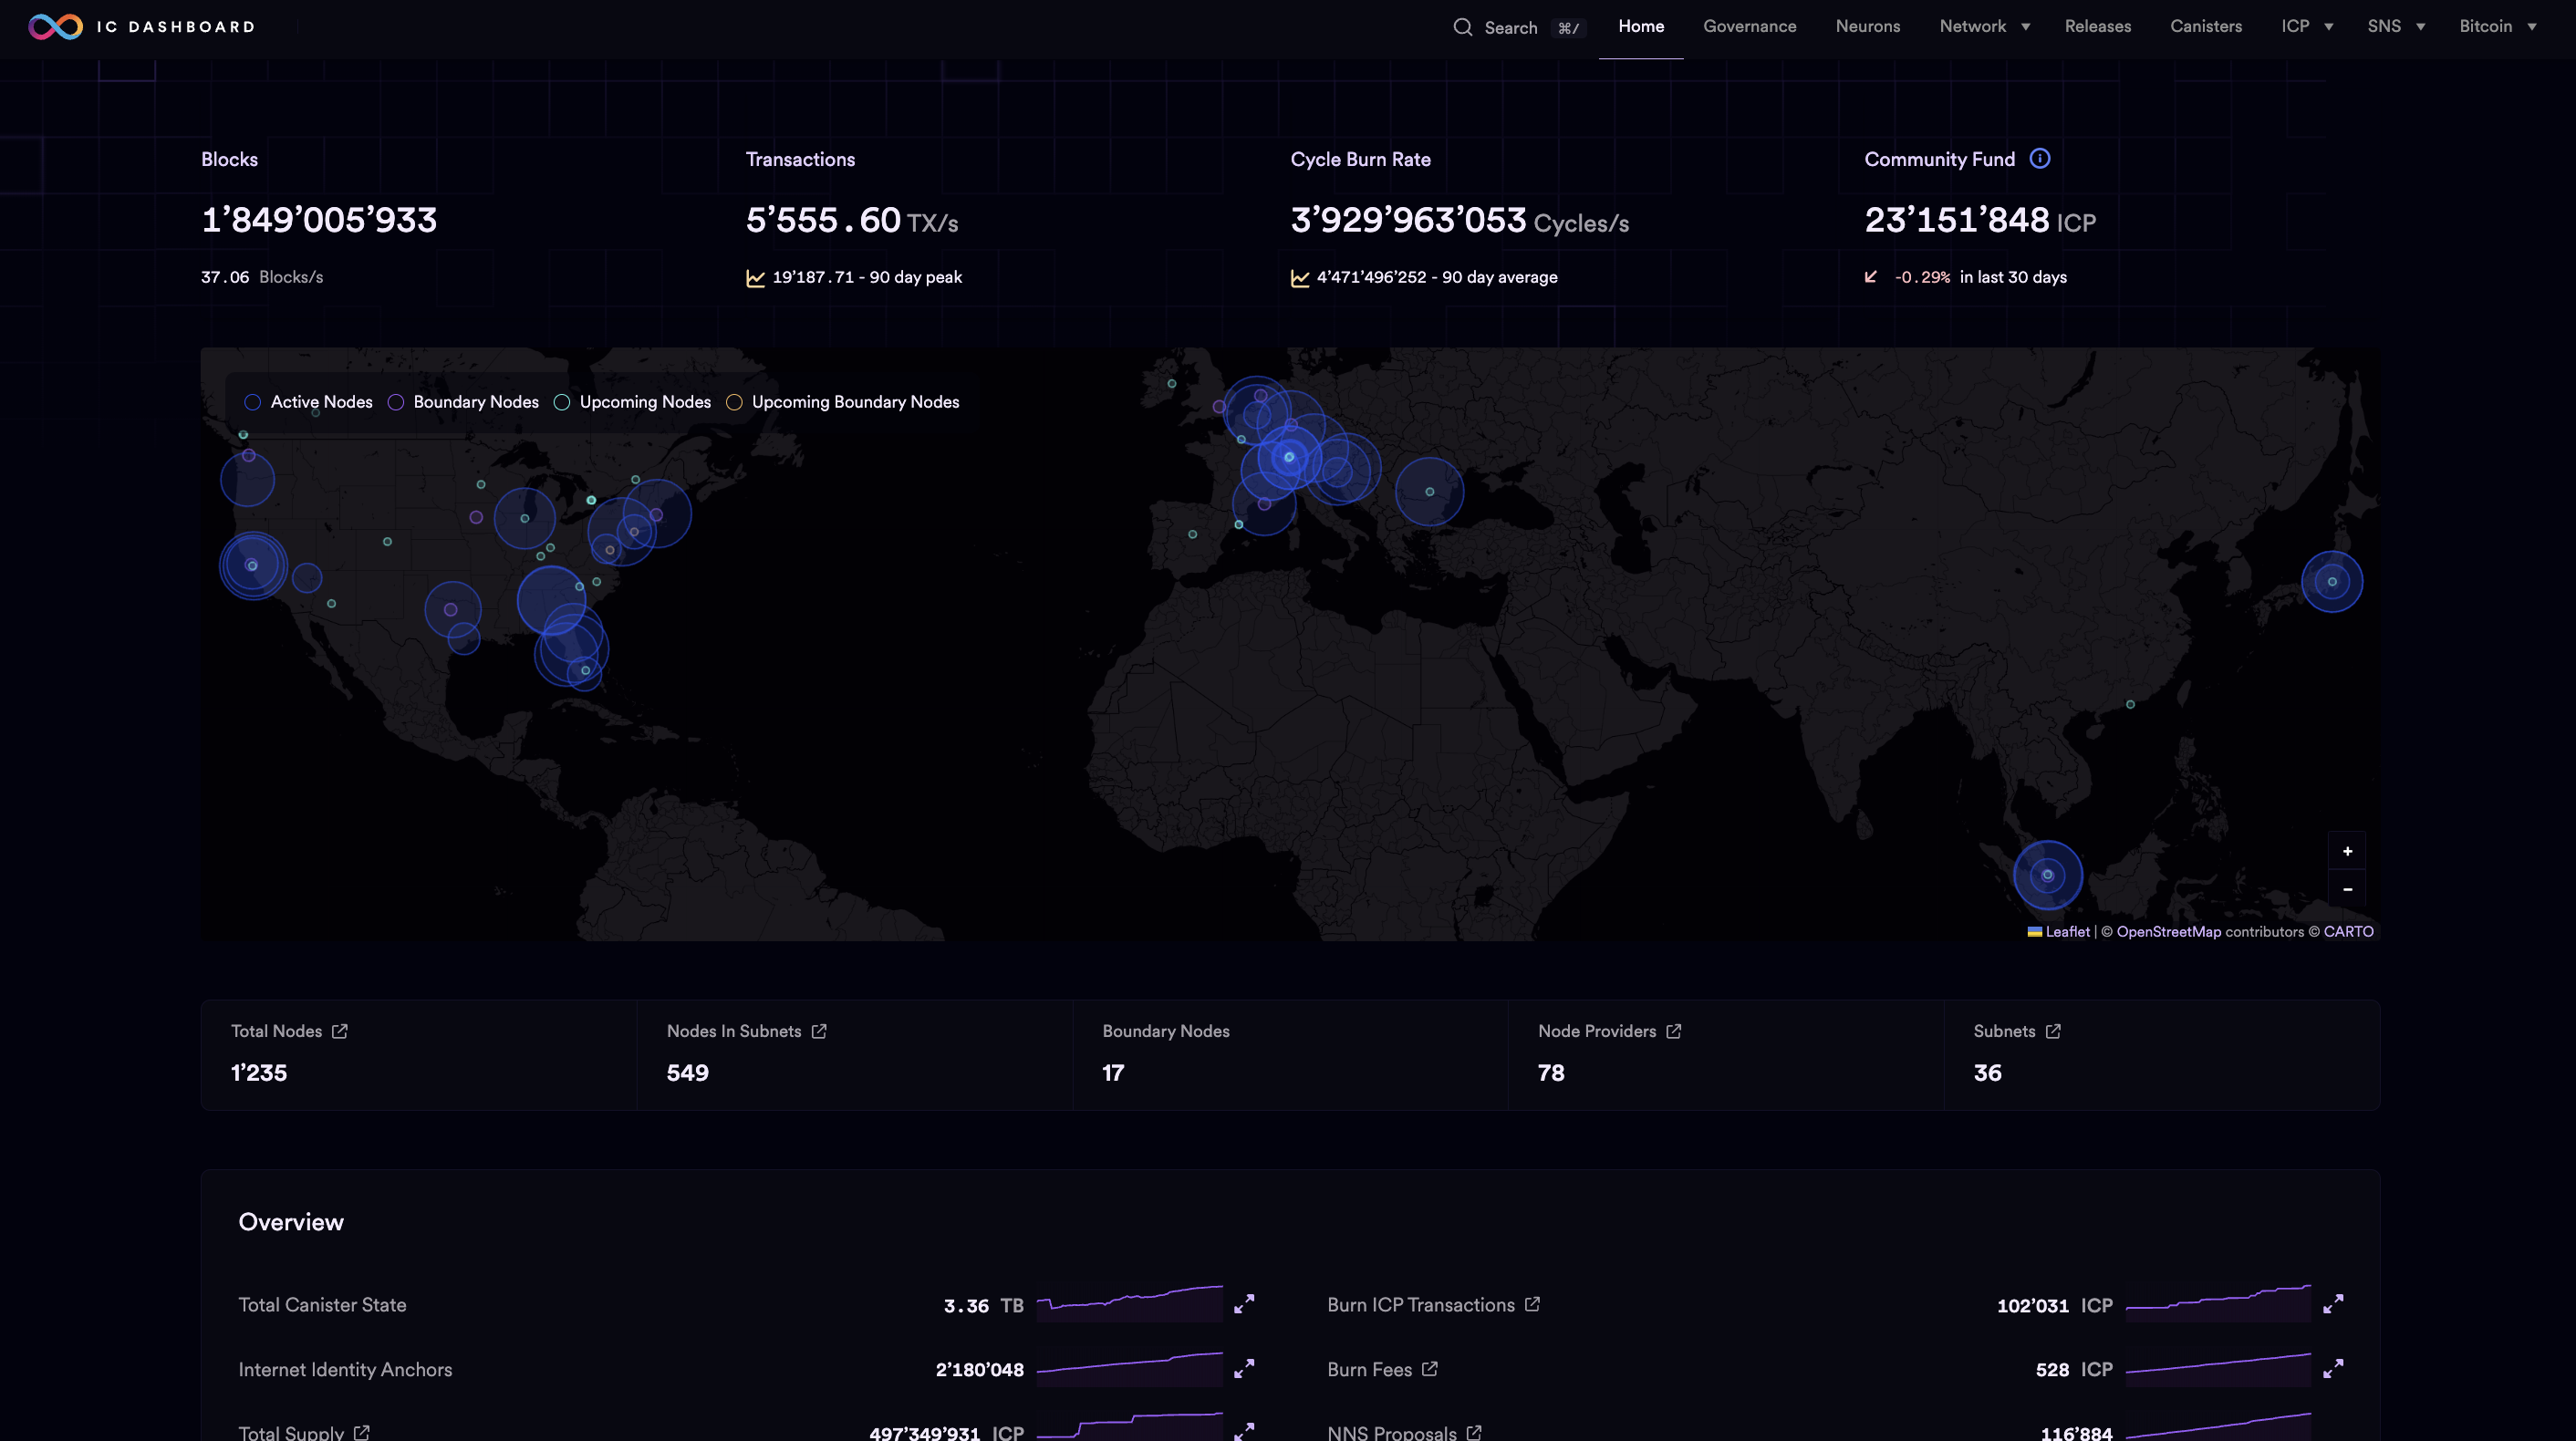
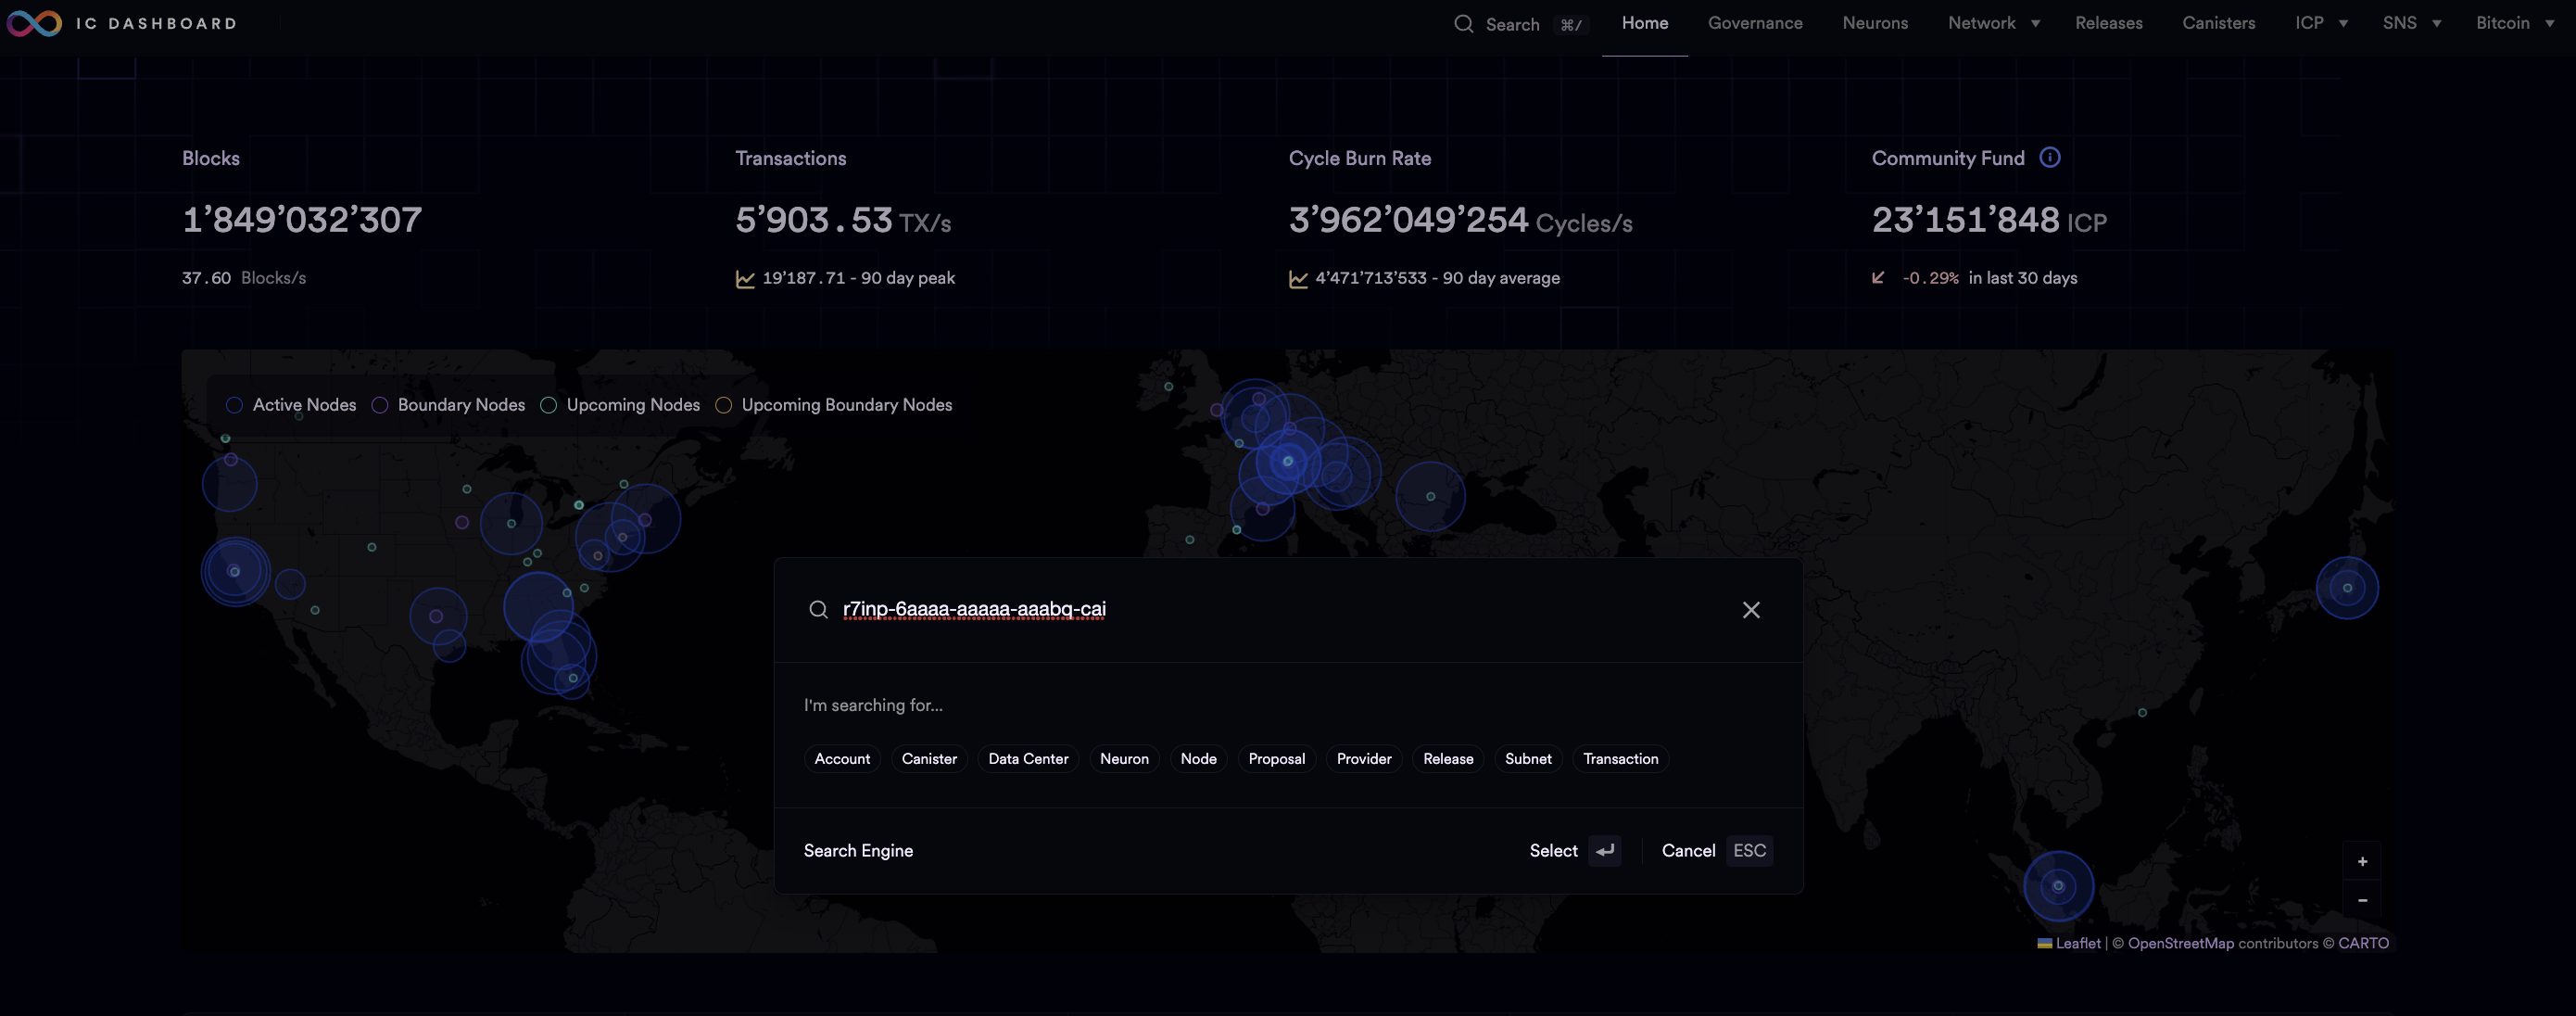
- In the search bar, enter the ID of the canister you want to examine.
- Scroll down through the list of methods until you reach the Canister Interface section.
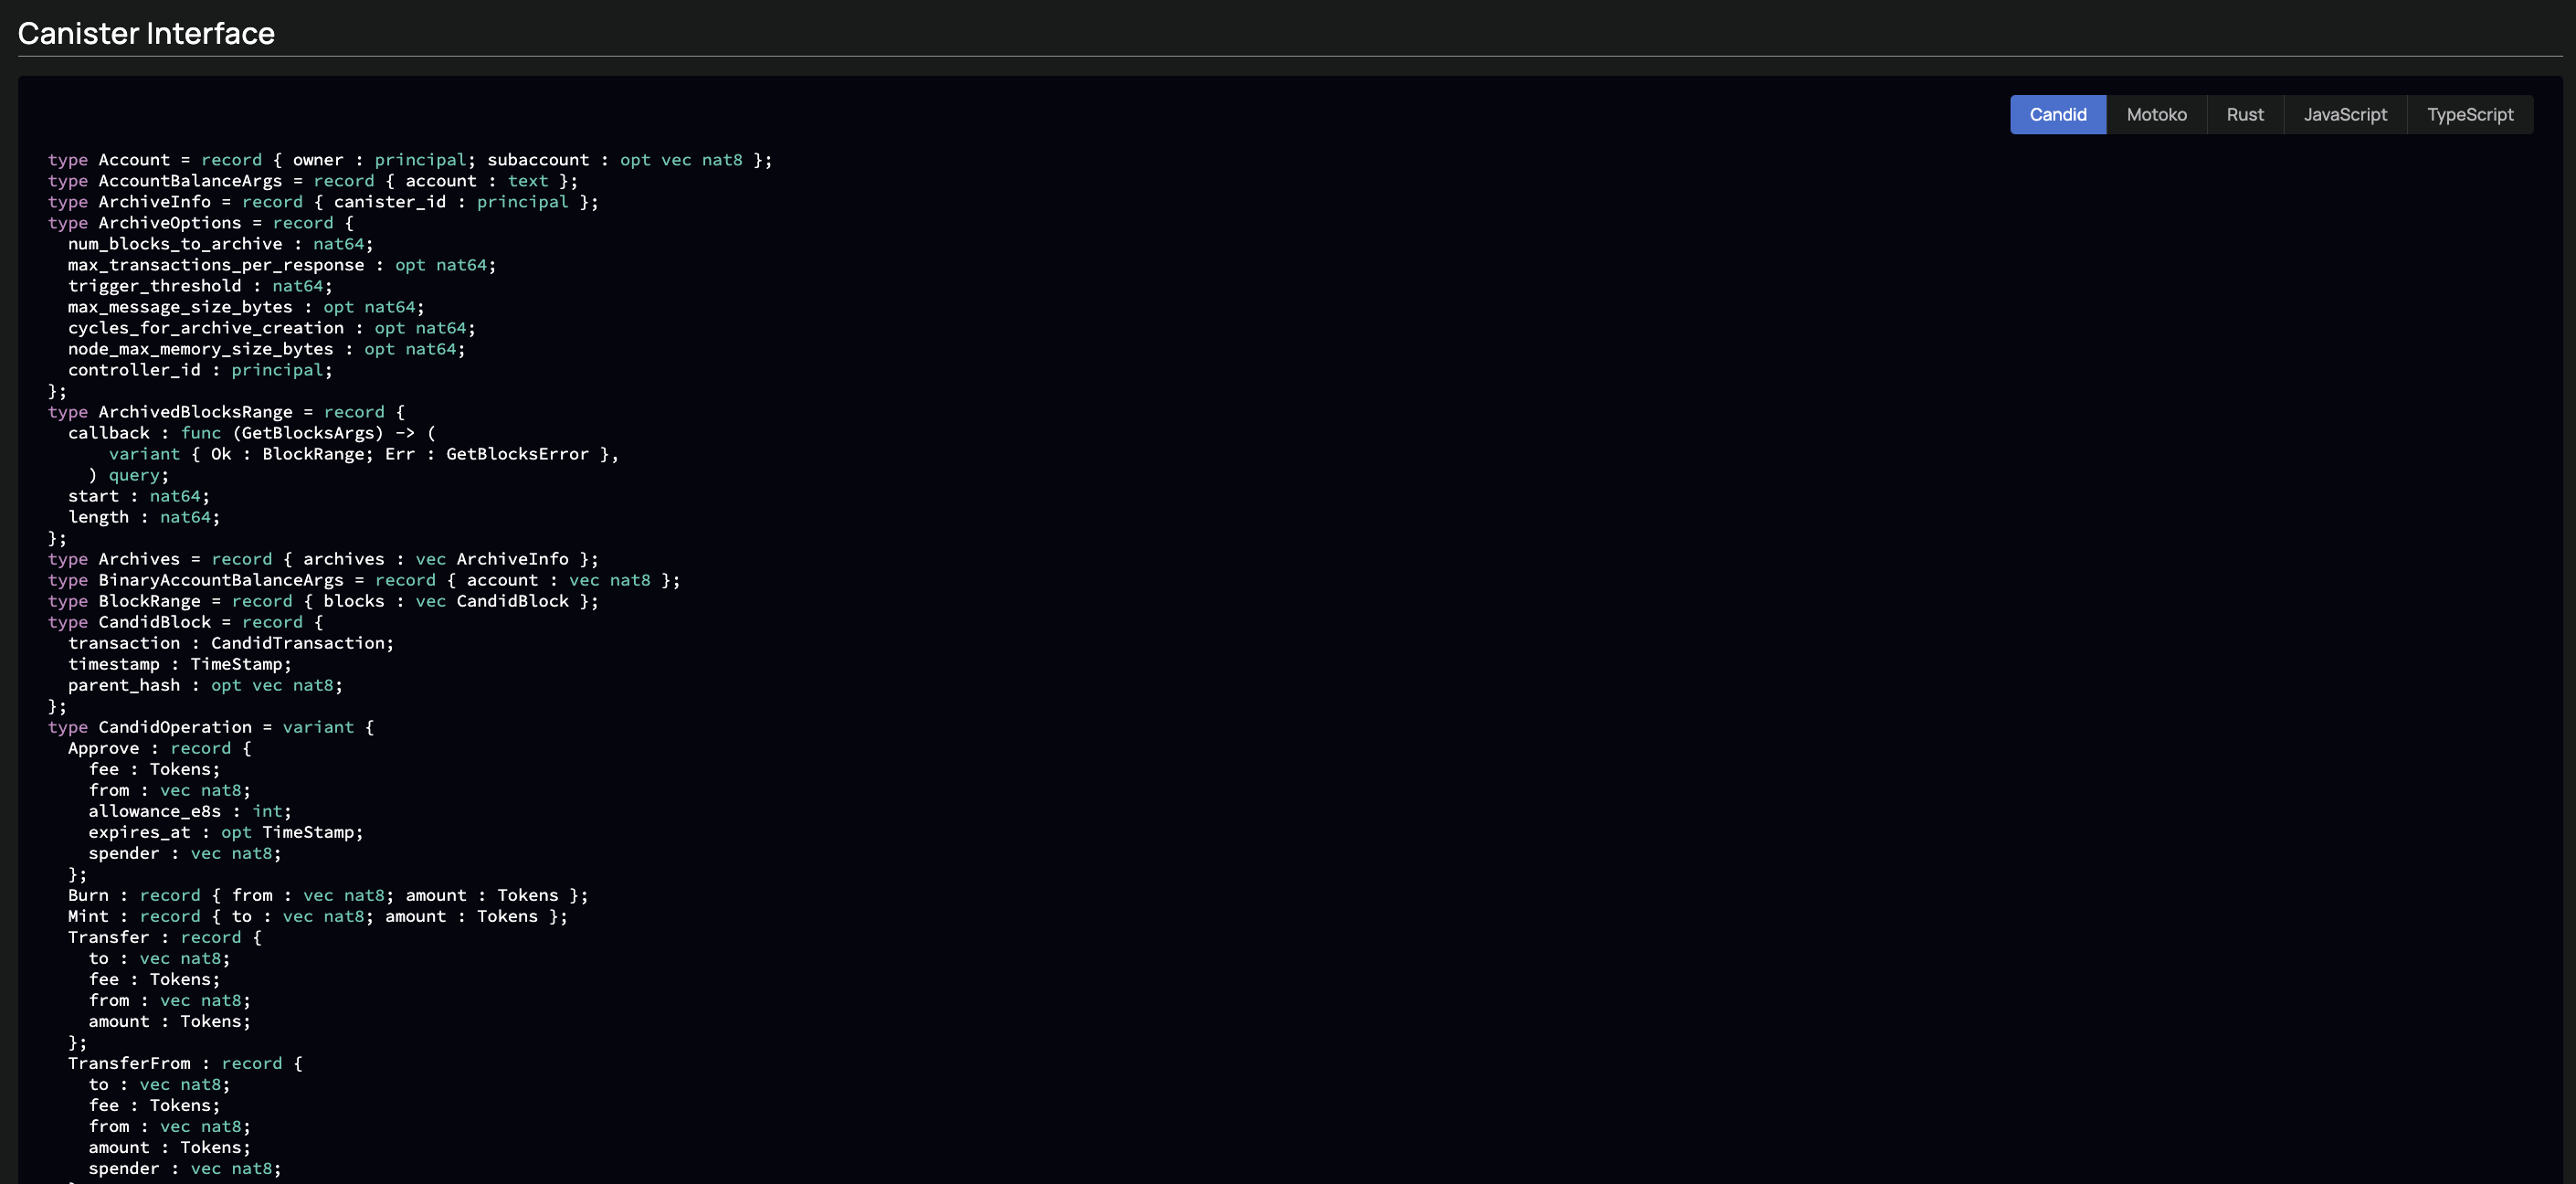
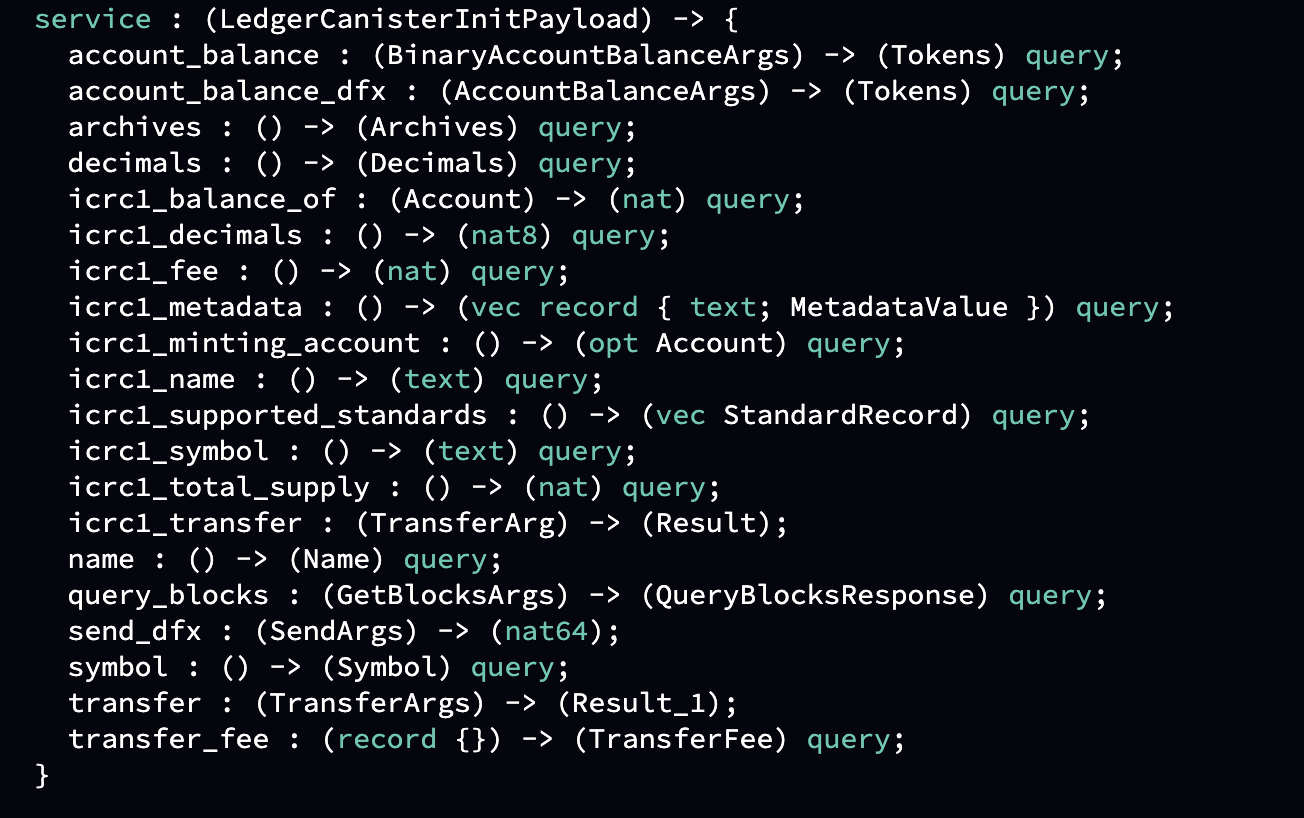
- Here, you can view a list of all public types used and the interface of the service, that lists all public methods.
- You can use the different tabs to see the interface in different languages (Candid, Motoko, Rust, JavaScript, Typescript).
Async values.
A canister processes its messages sequentially (one at-a-time), with each message representing a call to a public function.
Suppose you are canister A and you are calling canister B. The following sequence of events occurs:
- Canister A receives a message, which triggers a function. This function then initiates an inter-canister call which results in canister A sending a message to canister B.
- Canister B already has a queue of 2 messages, so the new message is added to the end of the queue.
- Canister A continues to receive and process additional messages, while canister B processes it's messages one-at-a time.
- Canister B eventually sends a response to canister A. The message is added to the queue of canister A.
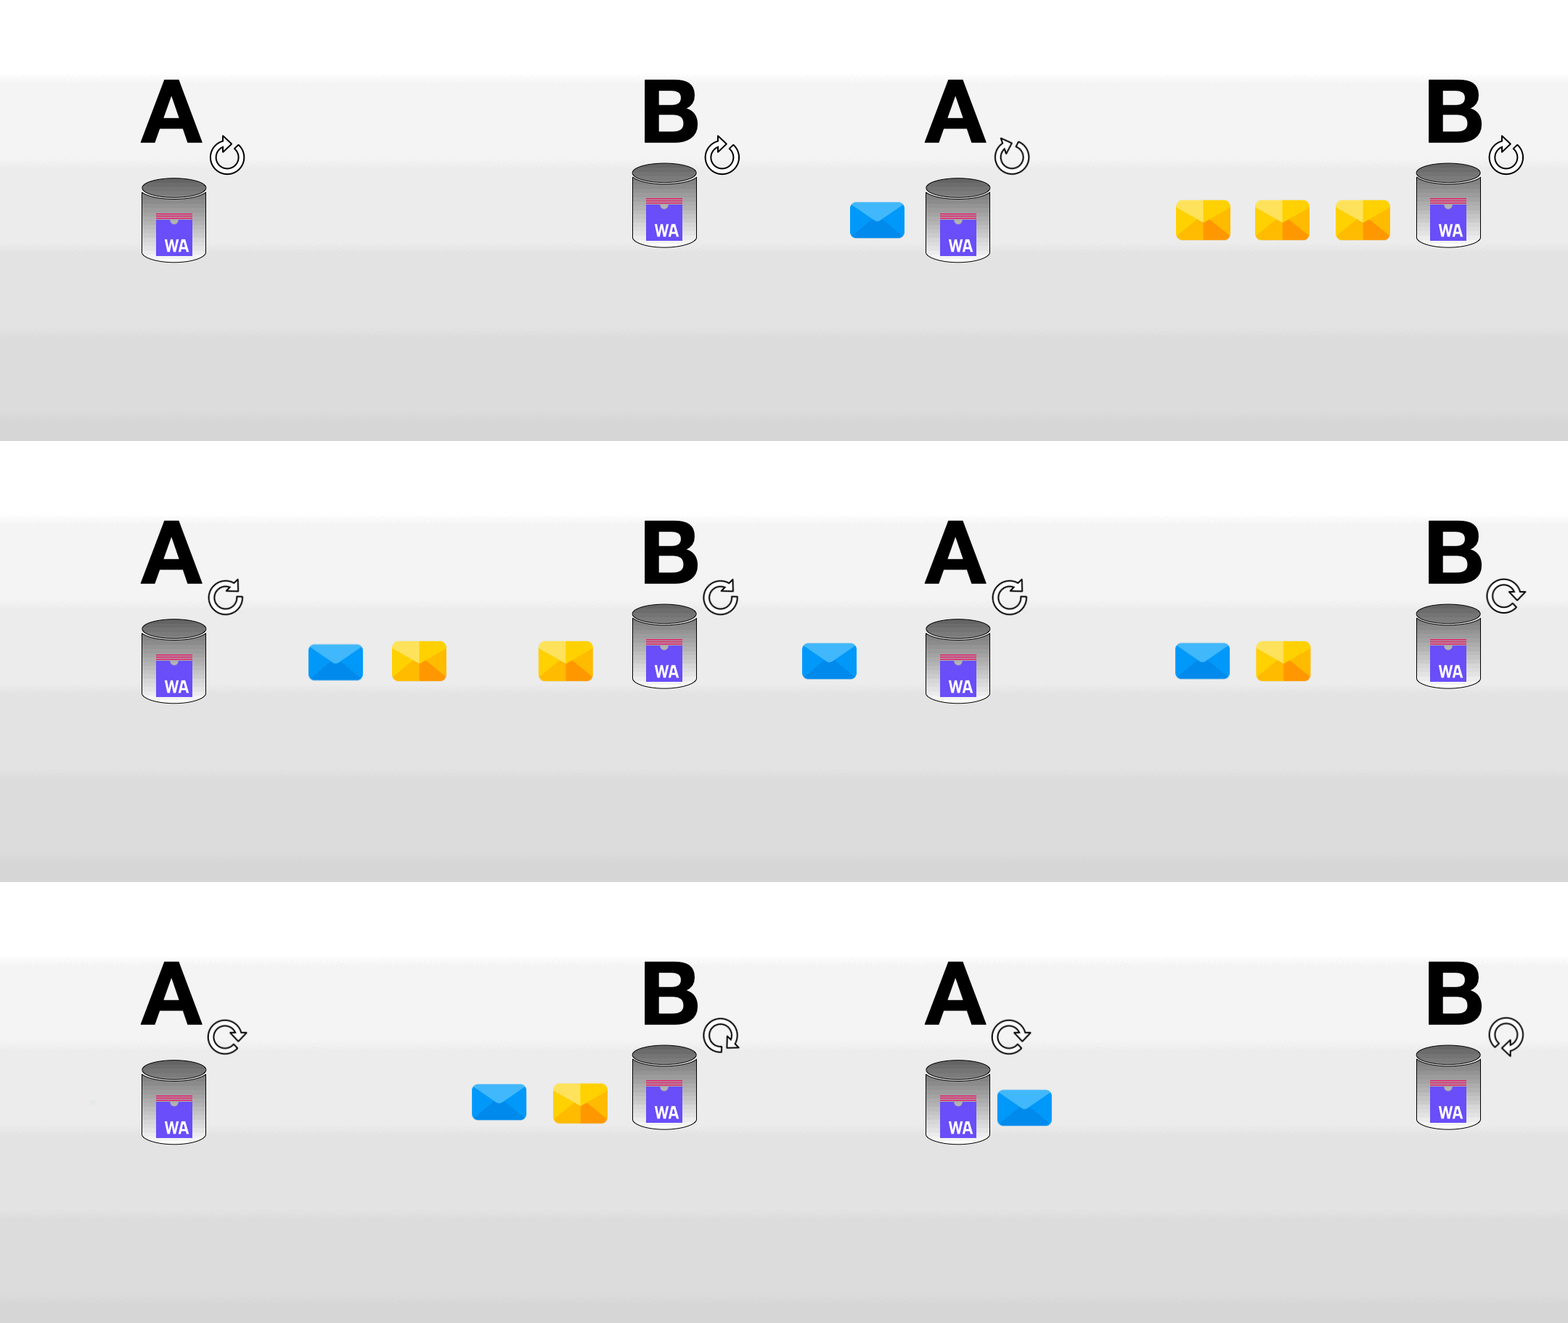
As you can see, between the instant you call a canister and the moment you receive a response, various events can happen, such as a user calling a function, an answer from a previous message returning, or another canister calling one of the public functions. These events can result in the internal state of the canister being significantly different from what you initially anticipated. Always keep that in mind!
Intra-Subnet vs Inter-Subnet
Intra-Subnet
When canister A and canister B belong to the same subnet, consensus is not required for inter-canister calls. This is because the inter-canister call results from a message being processed that had already been agreed upon during the previous consensus round. There is an upper limit to the amount of computation that can be handled within a single consensus round; however, assuming this limit is not surpassed, canister A will receive its response in the same round.
Inter-Subnet
When canister A and canister B are on different subnets, things get a bit trickier.
In such scenarios, messages need to travel via the XNet messaging system. This system is a protocol specifically designed to facilitate interactions across different subnets. It operates using a structure known as subnet streams.
Let's illustrate this with an example: Assume canister A resides in subnet A and it wants to send a message to canister B located in subnet B. In this case, the message would travel through the subnet stream from subnet A to subnet B. This subnet stream is consistently verified by the subnet each round. This is a crucial step as it allows subnet B to confirm the authenticity of the incoming messages. Since subnet B has access to the public key of subnet A, it can validate the signature on the certification, ensuring the integrity of the communication.
Here’s what happens, step by step:
- Message Reception at Canister A: A user sends a message to canister A. This message initially requires one consensus round to be processed by the subnet.
- Processing and Triggering Inter-Canister Call: Canister A takes over, processing the received message. During this process, it triggers an inter-canister call. This, in turn, generates a message in the subnet stream of subnet A aimed at subnet B. It’s important to note that this stream must be certified by the subnet, a process that typically occurs at the end of the execution cycle.
- Message Reception at Subnet B: Now, subnet B comes into play. It receives the message as a part of the subnet stream originating from subnet A. Here, it conducts a verification check to authenticate the message. Once verified, it adds the message to a block for processing.
- Processing at Canister B: Finally, canister B gets the message and processes it accordingly.